Wednesday, December 10, 2014

PPP3 - Alien: From Film to Game

I attended a lecture about the the newly released Video Game title, Alien: Isolation by Creative Assembly and how the source material has been transformed from 'Film to Game'.

The panel included:

Alistair Hope - Creative Lead (Started from Fine Art)
@wannaneeda

Dion Lay - Writer (Art background, started as Game tester for Creative Assembly)
@cannibalgymnast

Will Porter - Writer (Previously a games Journalist for PC Zone)
@batsphinx

Jamie Sefton - Managing Director (Games Republic)
@jeffers007


Early Stages of Ideas, Design and Research

- Alien: Isolation started as a tech demo. After a lot of positive feedback it was turned into a larger project and then eventually was decided to be developed into a fully fledged Video Game.

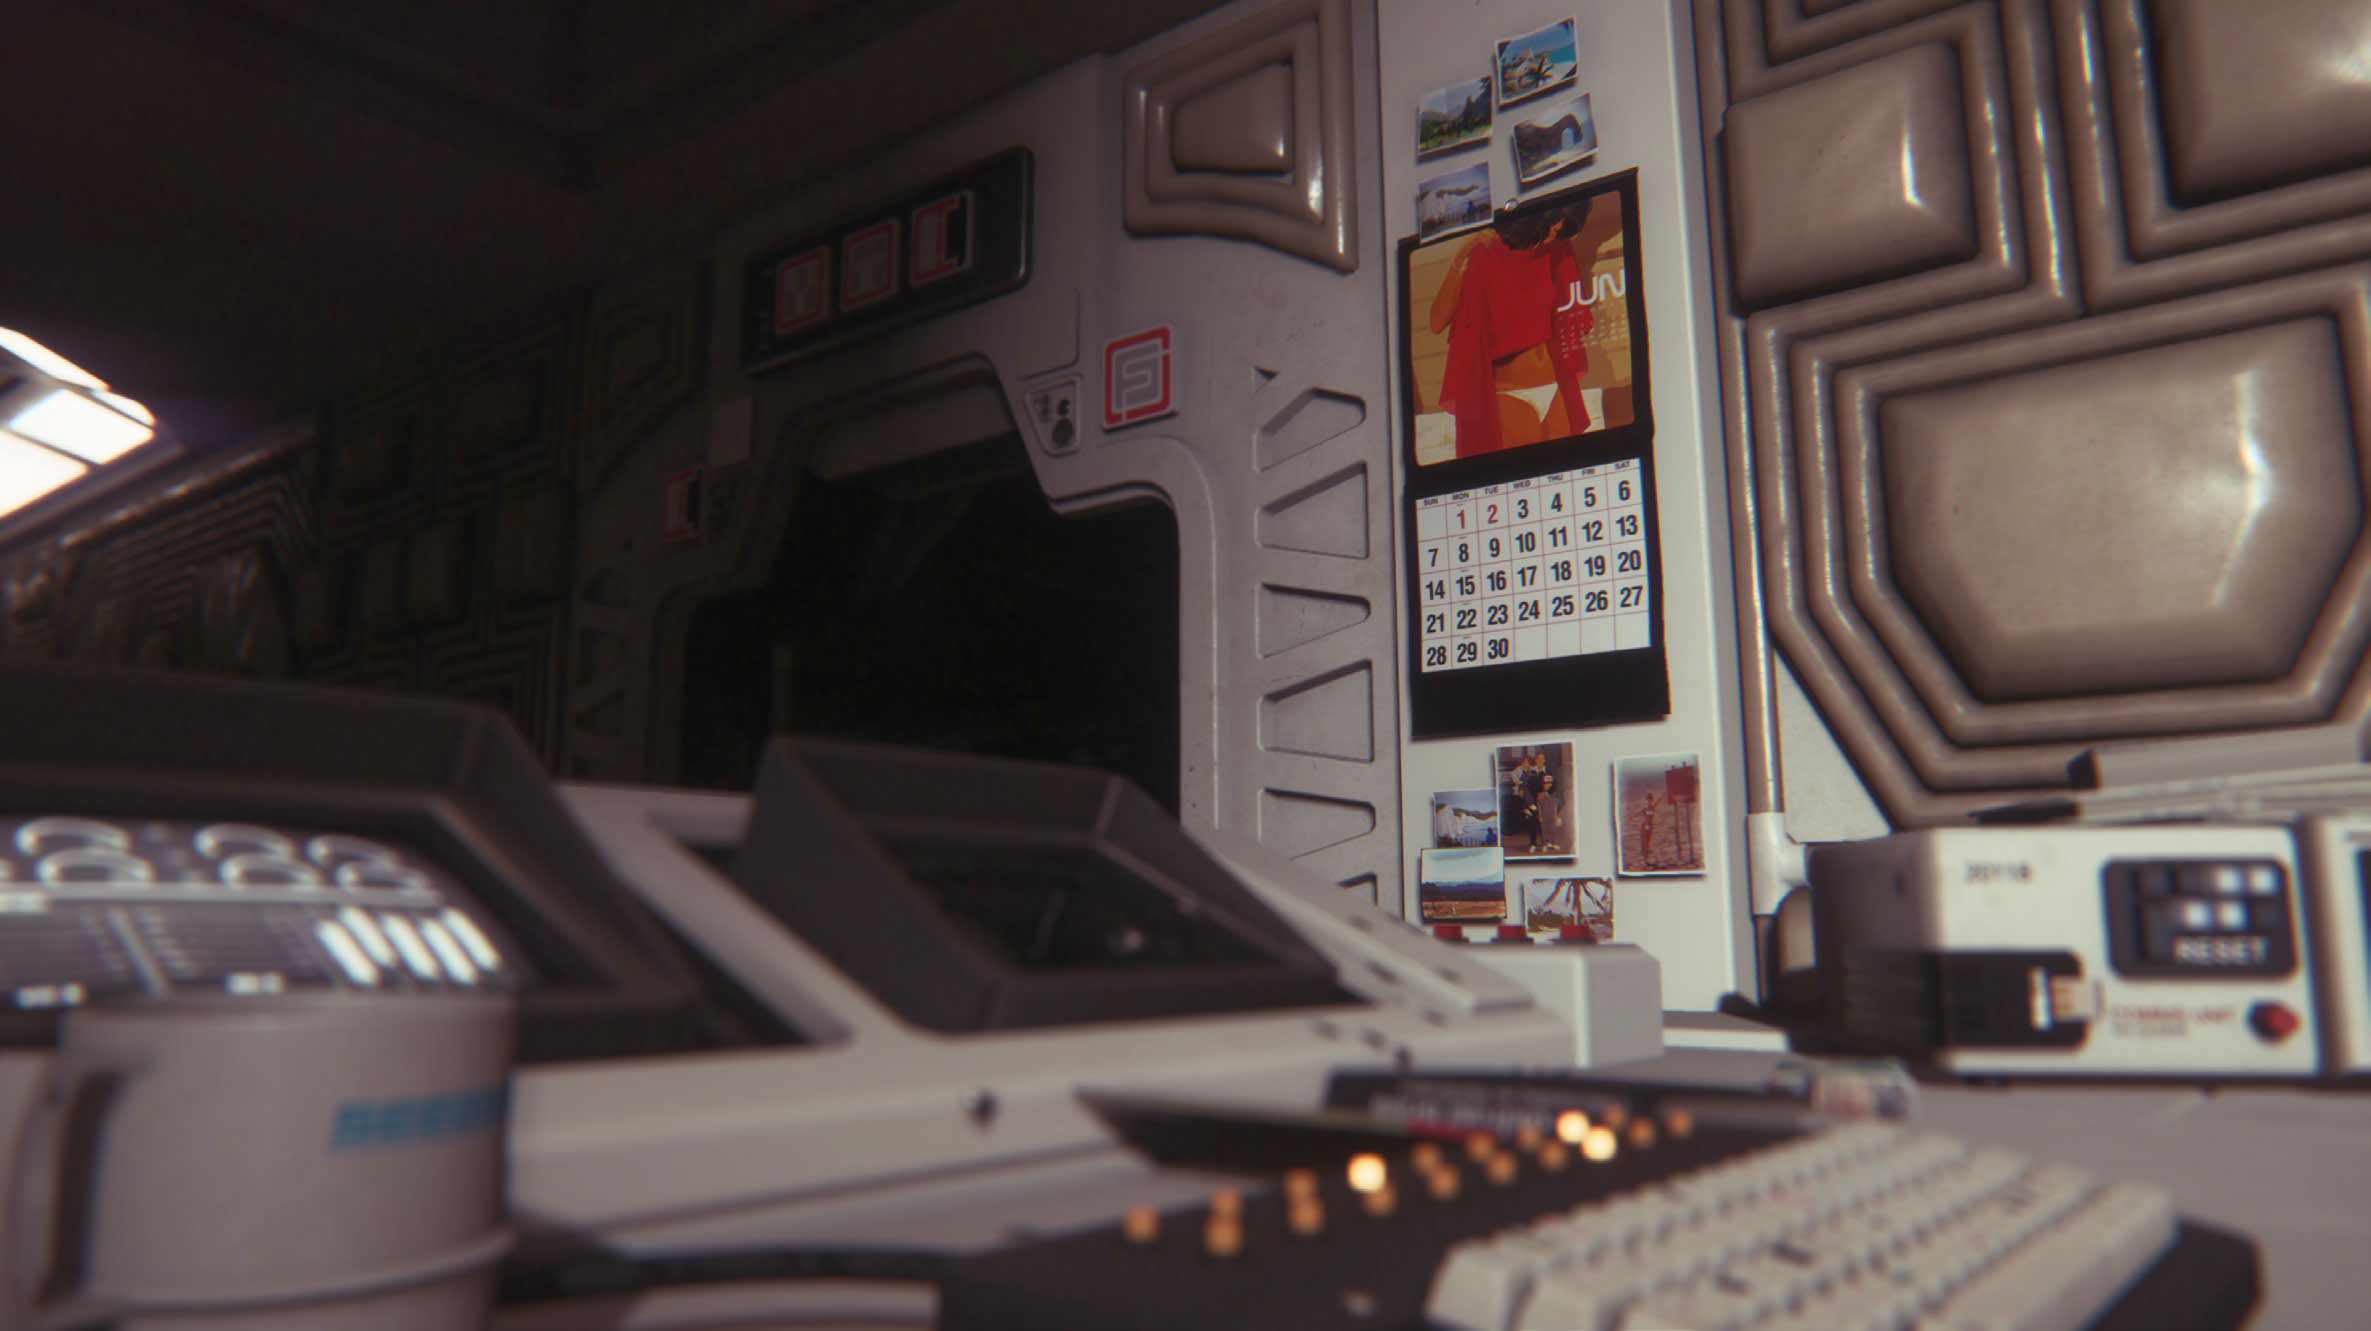
- It was decided to go with a monochromatic environment to give a sense of being in the films world.
. Wanted to seem less digital, less cold

- Concept Artists were given analog medium constraints. (e.g. Pen & Marker)
. This was because the original concept artists and designers in the 1979 Alien film had to work with these mediums.
. The hopes of doing this were that they would capture that same feeling of time/style in the original.

- The FOX broadcasting Company supplied Creative Assembly with 3TB worth of cataloged 'stuff' involved in the creation of the 1979 Alien film for them to use as research.
. Original concepts, unused sound recordings & scrapped ideas were included.

- By following the original source material closely and working in the same way the original makers of the 1979 Alien film did, Creative Assembly hoped to capture the same aesthetic and essence that made the original film so great.
. They wanted achieve the 'low-fi sci-fi' trademark style.

- With the need for content to build the concept into a fleshed-out game, there was a need to invent new stuff. However, this 'new stuff' needed to still feel like Alien.
. This proved difficult but do-able due to our future being very different from the imagined future in the 70's,
. This meant all sources of inspiration had to be restricted to nothing later than 1979.
. This was seen as both 'freeing' and 'restricting' at the same time.


Game Objectives, Creating the Alien and the Players Psyche.

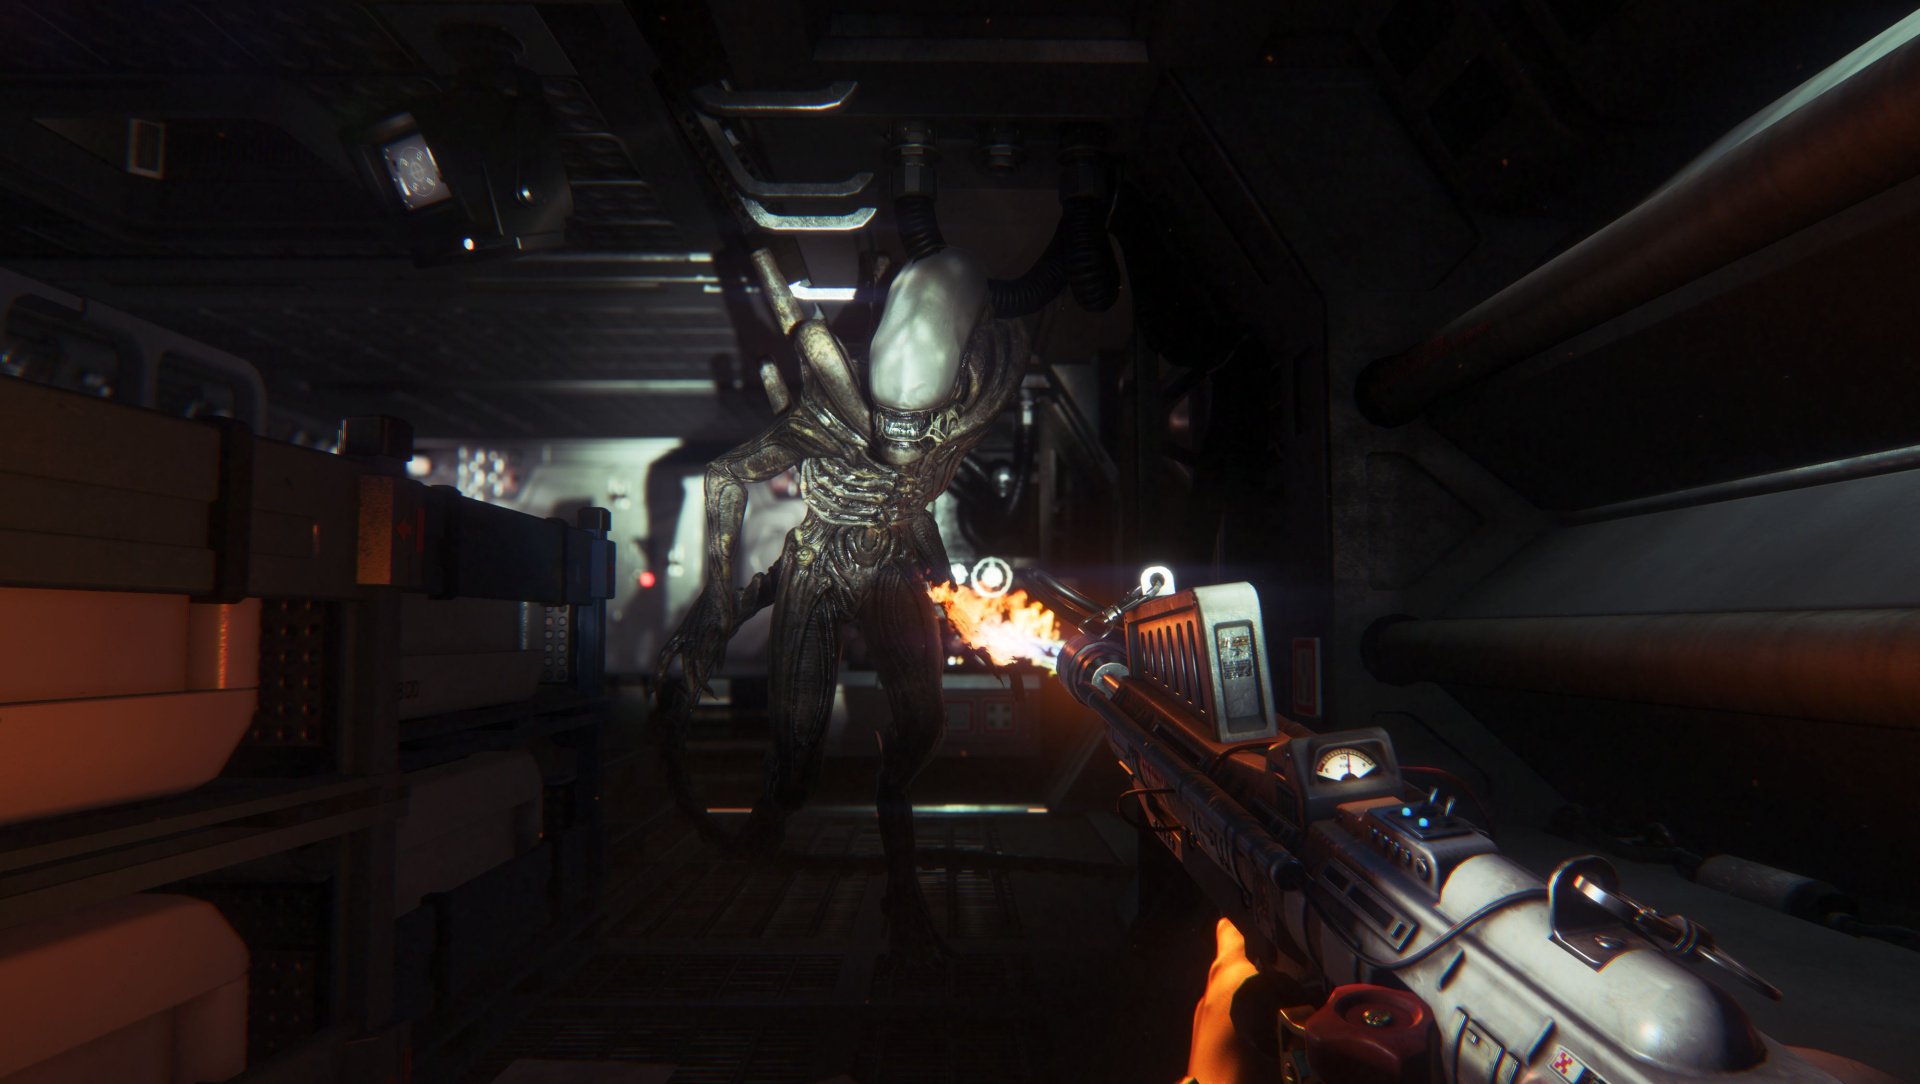
- The Alien's AI was purposefully created to listen/look and seek out the Player.
. This means every encounter with the Alien is different. 
. This also means every play-through of the game is different offering the potential of replay-ability and unpredictability. With this in mind, Creative Assembly hope that this will keep the Alien scary.

- Creative Assembly also decided to never name the Alien in the game. The Alien has been referred to as 'it' (e.g. "It's coming, I can hear it close by") instead of using terms like 'monster', 'creature' or 'alien'.
. The aim of this was to keep the Alien detached from identity and feel much more...well, alien.

- In terms of Animation, the Alien was purposefully made to move slowly when searching or the player in rooms and corridors. It even unfurls itself very slowly and dramatically after dropping down from a vent. 
. This shows power, no fear for surrounding people and its environment because it is the dominant life-form. It doesn't need to run, it stalks its prey.

- When it comes to the Sound aspect of the game, Creative Assembly had ideas to intensify encounters with the Alien. An example of this is, say the player hides in a locker because the Alien has just dropped down into the room and is seeking them. If the Alien comes close to the locker where the player is you will hear the environment/ambient sound "duck" down meaning the background noise will reduce as the foreground noise (in this case the Aliens breath and movements along with the players breath) feel much louder, more intense and more detailed to the players ears.
. This artificially pushes the player & the Alien closer and makes the happening incident feel a lot more intimate and claustrophobic. 

- Speaking of hiding in lockers, Creative Assembly wanted to give more realistic (which may appear as 'not many') hiding places in Alien: isolation than other games tend to.
. Places like lockers or literally hiding under a desk or medical table may present themselves as the only protection in some situations. 
. The hopes for having hiding places were that they would appeal to the players instinct to run/hide from danger and seek out safety constantly. They did not want Alien: Isolation to be about guns.

- At its core, the game objectives of Alien: Isolation are very simple. However the players self-doubt and constant weighing up if it's worth it making noise which might attract the Alien flesh out the game.
. Creates atmosphere & psychological involvement.
. Makes simple objectives & space between plot progression feel full and immersive.

- The original cast from the 1979 Alien film were also included in the development of Alien: Isolation at the request of Creative Assembly.
. In fact, it was Sigourney Weaver herself who mentioned referring to the Alien as 'creature' makes it seem much more friendly/cutesy to her and suggested something more detached like 'organism' or just simply 'it' made the Alien sound much more scary.

Tuesday, November 18, 2014

PPP3 - Unity Workshop #2


- Now we want to animate a door to open and close when triggered.
- In order to do this we need an OnTriggerExit script line added to our previous script with some modifications.

- When our Door opens it will move the collider and we don't want this.
- In order to get around this we need to make an 'Empty' object, parent our Door to it, delete the Doors own Box Collider and animate the Door without a collider.
- After this we need to create an animation for the door opening and an animation for the door closing.
- Once again we then need to go into the 'Animator' window where e should have 'OpeningDoor' and 'ClosingDoor' states.
- Here we create an 'Idle' state again and change it to the default state. Link the transition from this Idle to 'Open' state and mark conditions as if: True.
- We then create 2 Transitions again to the Opening and Closing states and change their conditions to match with the bools in our Door script which are: openDoor and closeDoor.


- Next we're making a Light that will turn on when the Player enters a trigger collider through the door.

Enables Light when entering Trigger Collider
- We tried to get a Light Switch working but for some reason it wasn't working. The WIP code is below though:


- On the bright side it includes 'GetKeyDown' commands, and I learnt from it how to create a Debug Log to check actions of the script.

! = 'Not. e.g. 'lightOn = !lightOn;'

EDIT: Updated Light Power script working as intended.
When In Range > Able to Press Button > Turn Light On.
When Out of Range > Button Press has No Effect.


- Random Generated Rooms = Look at 'Arrays'.


PPP3 - Unity Workshop #1


Scripting allows more control over certain actions and reactions in game - e.g. Walk speed. Scripting walk speed manually can help when working with a differently scaled asset created in an outside piece of software like Maya.

- When playing the AngryBots/Stealth Unity demo think of what the game designer is making happen.

 - Player movement, aiming, shooting.
- Damage applied to enemy from being hit, reducing health, eventually the enemy dies making the asset inactive.

Unity controls work on the X ad Z axis.
- If you want a level to appear skewed or diagonal in view from the camera, create the level on the X/Z Axis then use the main camera to make the level appear diagonal.

- If you don't create the game on the X/Z Axis but apply the main camera to the X/Z Axis it will mean the player controller won't be able to move in straight lines and it will require zig-zag waking in order to move forward/back/up/down.

Unity uses Javascript and C#.
- They can work together.

Player Health Script

From the 'Stealth' demo for Unity, there are short tutorial chapters on the Unity Asset store that give a walkthrough about how some of the things were achieved in the demo.

In Unity, there's a Centre or Local/Global pivot point for Asset controls, this is helpful in translating/rotating/scaling GameObjects.


Centre or Local/Global in Top Left Corner
- You can get a default Camera Follow Player script from importing packages.
- You can then find it through Standard Assets in the Project Window. 


SmoothFollow Script

The problem with this script is it won't allow the player controller to follow where the Mouse is aiming.  We can fix this in MonoDevelop with the PlayerMovement Script.
- Public Class = Always the same as the Script name, lower case sensitive.
- If you delete a curled bracket you need to delete its partner to. If yo click on a curled bracket it should highlight its partner for you to see.
Integers are solid numbers (1,2,3,4). Floats can be decimals (0.3, 1.7, 4.2)
- Bool = True/False
'//' = Comment in Scripting, will not interfere with coding.
- == is 'equals to'.
- = is 'equals'.
- Script-line 'Statements' need to end with a ; symbol.

- Public/Private script-line = Public can be edited within game and seen. Private = Editable only in script.
- Vector3 = Gives you co-ordinates of a space. (e.g. 2, 30, 16)
- If you want to Animate something you need to reference the Animation. e.g. Animator anim;
- In the language of C there, Script-Lines tend to start the first word with lower-case then proceed with capital words with no spaces. e.g. Rigidbody playerRigidBody;
- Void = Same as 'Function' in Javascript.
- Awake = When the game launches it runs this Script-Line.
- When you reference GetComponent in a script-line, the component you want selected should be in < >'s.
- In Scripting, Variables are lower-case, Functions are capitals.
- 'FixedUpdate' (Update) runs every frame in the game. Fixed Update comes after Update. FixedUpdate is usually applied for Game Physics.
- float h = Input.GetAxisRaw ("Horizontal") - h = Horizontal. 
- A 'void' command will never run itself however it is a command that can be accessed when told to.
            movement.Set (h, 0f, v);
            
            // Normalise the movement vector and make it proportional to the speed per second.
            movement = movement.normalized * speed * Time.deltaTime;

- If you apply the SmoothFollow script to the Main Camera nothing will happen at first, however if you drag whatever it is you want the Camera to follow into the box reading: None (Transform) the script should work properly.


In the image above you can see the script-line says 'h' and 'v' values are influenced by the Move, Turning and Animating 'void' commands beneath.

- In order to make Movement more dynamic for the player controller, you can change movement speed by using universal values. Like below:

 // Set the movement vector based on the axis input.
            movement.Set (h, 0f, v);
            
// Normalise the movement vector and make it proportional to the speed per second.
            movement = movement.normalized * speed * Time.deltaTime;

- Next on camera turning, the below script-line translates to. Where out camera faces, a ray is cast, this ray is affected by the players Mouse Position on screen.

// Create a ray from the mouse cursor on screen in the direction of the camera.
            Ray camRay = Camera.main.ScreenPointToRay (Input.mousePosition);            Debug.DrawRay (camRay.origin, camRay.direction *1000, Color.red);


- It then says, If the Mouse Position collides with the Floor layer mask, the ray of the camera view will be affected.

   // Perform the raycast and if it hits something on the floor layer...
            if(Physics.Raycast (camRay, out floorHit, camRayLength, floorMask))

The whole 'void Turning' script is:


Trying to animate a floor panel to fall away from the floor when walked over.
- Add a Box Collider, adjust centre pivot via X,Y, Z values. 
- Colliders = Components > Physics > Box Collider.


- We then add a 2nd Box Collider, switch to 'Trigger'. This will mean when the Player Controller passes through this collider it will trigger what we tell it to.


After the Colliders are applied to the Asset, we want to give it an animation to trigger when the player touches the Trigger Collider.
- To do this we go to the animation window, create a new clip, assign it to an appropriate save place and begin to animate on the time-line.
- I've given the floor tile a slight wobble animation followed by it falling away from the floor.
- The result should be, Player Walks > Player Collides the Trigger > Floor Box Collider triggers Animation > Animation completes.


Finished Animation Timeline

- Next we need to go to Component > Miscellaneous > Animator - and apply this to the Floor Tile.
- Then we need to go to Project > Create > Animator Controller.


- You then drag the Animator Controller onto the Controller line of the Animator applied to Floor Tile. ( shown in the above Left Image)

-------

- If you're going to Animate in Unity, create a parent for the Asset and then animate everything underneath it (In the Hierarchy).


- With the Floor Tile selected, go to the Animator window and in the bottom left corner, create a new 'bool' parameter. (Named: platformFalling) - Variable, lower-case again.


- Create a new 'State' in the Animator window. We can put this in the middle of 'Any' and 'FallingPlat' and rename it to 'Idle'.
- We then need to right Click the 'Idle' state and set it as default so it won't automatically play the Falling Platform animation when the game starts.


- If you then Right-Click the 'Idle' State and Make Transition, link it to the 'Falling Plat' state, you should have a link between states.
- If you click on this link, you can see a 'Conditions' box on the far right.
- Change the 'Conditions' to the script you've created for the trigger event and set as 'true'.


- After applying the 'Destroy' script to the Floor Tile, go to the Animator window and 'Add Event' at the end of the animation timeline for the asset.
- After clicking to add a new event it should ask you what Function you want to apply to the event on the timeline. From here select the 'Destroy' script that has been attached to your Floor Tile asset.
- Playing the game should now mean when the Floor Tile falling animation is triggered, it will be destroyed after completing the animation.


The Floor Tile has fallen and been Destroyed. No collider for the Player to interact with left.

Thursday, November 13, 2014

PPP3 - After Effects & Motion Comics


3D Layers & Camera Setup

To avoid sending too much data over the network at University, create a local Cache folder for your work within After Effects.

After Effects > Preferences > Media & Disk Caches

Change the location to the scratch disk, make AE its own Cache folder and reduce max size to 50GB.


Import Animation Ready File, change format to Composition. Keep it editable, do NOT merge.


Reduce the Composition resolution down to 1920x1080 in Composition > Composition Settings

- Change all layers in composition into 3D layers.


- Set up  views in your Project Window (Front + Top). Similar to Orthographic view in Maya.
- Transform the Z position of each layer to give the effect of separate 3D layers. (Parallax)


Now make a Camera to view the 3D Layers through.

Layer > New > Camera

- Enable Depth of Field so you can adjust focus and aperture of the camera in the composition to convey depth better.
- If you enable global Motion Blur this will also help too.

Camera Options

After you've set up the parallax, depth of field on the camera and its position you can animate the camera to appear like you're flying through the scenery.

2-View look of Camera's POV

Puppet Tool

- Using the 'Space Scene' PSD file provided, create a new project.
- Select the Claw layer.
- Select the 'Pin' tool, ticking the Mesh box next to it.


Once the Pin is placed on the Claw layer, an elastic Mesh should appear on the layer

After putting a few pins in the Ship and Astronauts legs and arms, I got something ridiculous like this:


The Ships legs in particular are a little to bendy and look too organic.
- A way to fix this is starching a puppet.
- Hold Left-Click on the Pin Tool to bring up the Starch tool selection.


After this, reset the Legs positions under the Composition Layer Effects menu.
- Apply starch to the Top and Bottom joints of the Leg meshes.

One last thing with Puppet-making in AE is overlapping.

- Holding Left-Click on the Pin Tool again will bring up the Overlapping Tool for you to select.
- Apply a dot onto the place you want to overlap (The Astronauts Hand for example)
- Apply the extent to which you want this dot to effect the mesh. (The entire arm of the Astronaut)
- Then reduce the 'in Front' percentage in order to give the value of what distance you want the Astronauts hand to have in terms of depth.


I really like the effect you can get with the effect of parallax and depth perception in After Effects. A great example of seeing it in the cinematic world is the trailer for Guild Wars 2 created in 2009. The entire trailer is compiled from various pieces of concept art for the game forged into a narrated 2D story with movement.

CoP 3 - Neverwinter's Foundry Practical Planning


I've decided to adapt a James Bond into a Neverwinter quest/storyline. I wanted a sort of iconic world/cast of characters that people would be able to recognise even if presented through a very different platform, others I had in mine such as Lord of the Rings and Star Wars seemed a little bit too big in scale to recreate. James Bond however, I feel is on a much smaller scale and is just as iconic. I think I've got plenty to work with to reference to players which will make the satire of the whole thing easily recognised.

So planning out somethings for consideration when making the quest itself in the Foundry, I think I'll be going with a heavily inspired Goldeneye theme although I might just slap in some other references from other films to make it into a bit of a Bond mash-up storyline.

Characters:

- James Bond/Agent 007 > Player
- M > Quest NPC, Mission Assignment (Questgiver?)
- Q > Quest NPC, Present the Player with helpful equipment, talk over tactics.
- Natalya Simonova > Quest NPC, Damsel in Distress Cliché?
- Agent 006/Janus > End Boss. (Quest Completion)
- General Arkady Grigorovich Ourumov > Red Herring Enemy
- Xenia Onatopp > Femme Fatale Mini-Boss.
- Boris Grishenko - Intelligent, Technowiz Mini-Boss.

Concise Quest Description:

- Quest Brief from M delivered, to work with 006 to take down General Arkady Grigorovich Ourumov (works for Janus Crime Syndicate).
- Q provides Player with some kind of equipment/reward to help with the quest.
- Ourumov kills 006, Player kills Ourumov.
- Player tracks down a lead for the Janus Crime Syndicate, Xenia Onatopp.
- Player finds and kills Xenia, after she says the Player needs to find Boris Grishenko for intel on the location of the leader of the Janus Crime Syndicate.
- Player does some kind of object finding/interactive (puzzle?) sub-quest to enter Boris Grishenko's lab.
- Player kills Boris Grishenko and retracts information on the Janus Crime Syndicates' leader's location.
- 006 Ambushes Player explaining he has betrayed him, Player has to defeat 006.
- End quest at M.


I'm really hoping all of this is possible, depending on how flexible the game allows me to be with map transitions, this should be doable!

Monday, November 10, 2014

PPP3 - City of the Dead and Storytelling Devices


Last week I went to Edinburgh for the day to go on the City of The Dead tour. It was mainly the idea of someone else on the course because it has a direct link to what they're doing with their work. I didn't expect to get too much out of it in terms of inspiration or a source to take notes from regarding any expected work I'd be doing for University.

However! I was surprised to find out there was plenty there that I could take on board for storytelling. Because, really...me being a huge cynic and a stick in the mud when it comes to the supernatural and horror in general the locations we visited in the tour didn't inspire me so much. They were cold, dark and damp - underground vaults, old crypt and a graveyard but none of that felt very impressive, in fact most of my attention towards my surroundings were aimed at not falling over all the bloody debris on the floor. *Scroll to the bottom of the post for the tl;dr*

Anyway, the highlight of the tour and the real source for some inspiration was the tour guide, Fred. This guy clearly loves his job because throughout the whole tour when he was telling anecdotes of supposed previous tourists and teaching of us of the history of Edinburgh he really painted the scene of ye olde Edinburgh with passion and made me fully engrossed in the lore of the local horror stories.

From watching Fred basically 'perform' through the tour I noticed some very effective ways of storytelling and what was more refreshing about it was the fact that it was in person. Just good old fashioned real storytelling from one person to another back before the reign of technology started, however many eons ago that was.

Setting the Scene, Getting the Audience to Care

Fred started by taking us out on the streets into Oldtown and giving us a quick history lesson on what it was like in Edinburgh. The state of the economy, the huge difference of lifestyle between the classes, the hygiene of the population, the architecture of the city. Pretty much everything you needed to know to get the feeling of the place hundreds of years ago. What was really interesting was none of it was about ghosts, poltergeists or anything. It's pretty clear we're all there to get scared for a thrill but for the first 20 minutes we've stood in a public outside street talking about the crappy conditions of Edinburgh ages ago. It clicked in my head though that the tour has been cleverly constructed, written out and planned as a journey for the tourists themselves. He wasn't just going to pass on some ghost story and wave us off at the end, he's doing a real narrative. He's trying to set the scene, paint me a picture and get me to feel like I'm part of the story he's going to tell. I think this important in every storytelling device. I mean, think about a Horror game, it's easy to jump straight in and have some scares (I'd argue Outlast is like this) but if you really want to tell a story to get the player invested and feel for what happens to the character they're playing you need to set-up the world/characters before just diving in to the scares (I'd say The Last of Us is a good example of this).

Breaking Character, Leading Direction, Softening the Blow

Next were the underground vaults - where the scaring started. At this point we've built up a relationship with the lovely Fred, we trust him, he's Mr. Knows-everything-about-Edinburgh at this point to us and we think he's on our side. He's not. Always good a twist when the narrator in a film/game is the bad guy. See, Fred starts giving us more history about the vaults while weaving in anecdotes of old folklore of the 'Southern Entity' who supposedly haunts the vaults and then even starts to talk about previous tour guests who have had experiences with the entity.

He builds up a story about a woman feeling tapping on her shoulder again and again, she moves further back in the corner at the end of the room until she's clear of everyone around her and yet she still feels the tapping on her shoulder. She raises her hand and says to the tour guide, "Excuse me, I think the entity is tapping on my shoulder right now...". To which the tour guide replies "Put your hand on your shoulder"...so she does. "Is it wet?" he says. The woman nods to the tour guide.

...Then Fred points his light up to the ceiling..."Yeah we've got a bad leak problem down here."

This relieves the tension in the room and most laugh with that "Oh for gods sake..." look on their faces. I thought this was brilliant on Fred's part, at this point I've learned he isn't to be trusted. It isn't just a tour to listen to stories, Fred is going to mess with you and then just as you think something scary is coming he's going to give you a punchline to ease you up a bit so you trust him a little again. only to then mess with you once again. I found this to be really clever given the fact that we're in a setting he's just described as a horrific place and now there's a group of us stood in the pitch black laughing at the ceiling looking like a nervous wreck.

Immersion

Fred takes us into the bigger vault next where again he sets the scene and informs us on the history of the place. Following this again he starts to tell another anecdotal story of a previous tour guest back in the 70's when kids were allowed on the tour because reasons (read: hippies). So Fred is stood in the middle of the room and we're huddled around him in the big underground vault with just the light from candle in Freds hands. Fred goes on to say that in the 70's there was a woman and her child along for the story, the tour was going smoothly as usual and then suddenly while the tour guide was telling the crowd of the vaults history his candle went out. At which point Fred blew his candle out and the entire crowd crapped their pants.

I. Love. This. Guy. Well I didn't at the time but I can appreciate it now, Fred knew what he was doing...by now we're complacent to the stories he's told us, we think we're fine because we're with nice, ol' funny Fred who we trust. Only Fred just turned out the only light we had inside a vault where thousands have died and is apparently haunted by an extremely aggressive poltergeist. Fred continues in the dark. Fred says the tour guide kept trying to relight the candle while Fred himself is flicking the flint on his lighter unsuccessfully too. He says while this is happening, the woman is holding on to her child's hand tightly until she feels her daughters hand grip tighten impossibly and wont let go - the woman is filled with this anger and hatred to the point where the feeling of dread inside her makes her kick her own daughter off of her. She cries out for her daughter over and over with no reply.

The tour guide is still trying to relight the candle. So is Fred. While we're stood in the dark, Fred is telling this story while quietly moving around the semi-circle we've formed. His voice sounding very close and then distance. Genius. The candle comes back on. Fred says everything appeared to be normal and then they see the woman's daughter crouched in the corner crying. The mother goes over to her daughter and then she turns around with scratches all over her hands. Her mother asks her what happened and the daughter replies with "The monster grabbed my hand." The mother asks her daughter how she knew it was a monster and the daughter replies with "Because you don't have claws..." and then Fred let loose a party popper and once again the entire crowd crapped themselves.

The last bit was a bit lame, yeah but the rest I thought was genius. Recreating with the current crowd what had happened to the tour group in the story he was telling was incredibly immersive for me. It's a weird feeling to describe but I felt like I was in a film or in a flashback of what had happened which made it scary. The acknowledgement of messing with our senses was there too, taking away our vision so we'd pay much more attention every breath and footstep Fred took was much more terrifying than just standing there with his candle and telling us the story in a straight forward manner.

Concise Version:

- Setting the scene, building an understanding and connection with a world/character is important before you even begin to tell a story.
- The narrator of the story can be presented in the literal sense of the word and doesn't necessarily have to be an ally of the audience.
- To maximize audience investment in a story, making it feel personal always helps. This doesn't necessarily have to be just through emotions towards characters in a story it can also be the audience feelings about themselves in a story's world. (A persons senses can play into this experience.)
- I gained a lot of ideas on how to make an audience feel more involved, immersed and interacted with in terms of storytelling from the tour and I'm really glad I made the effort to go!

Thursday, November 6, 2014

PPP3 - Unity Workshop


New Project
Edit > Project Settings > Quality


Anisotropic Textures - Blending Textures (predominantly in Z-Axis)
Anti-Aliasing - Texture Edge Blur/Blending

Quality Settings (Default): Scale of Performance to Quality.
- Fastest
- Fast
- Simple
- Good
- Beautiful
- Fantastic

Fastest

Fantastic


With the Directional Light I'm using it automatically makes the shadow quality coincide with the quality default settings in the Project Quality menu. However, it's possible to change every individual light to different levels of quality.


You may see step-like lines on edges of some objects, this can be altered by going to Edit > Project Settings > Player.

Under Other Settings: Rendering Path* - By Default set to Forward, switch to Deferred Lighting.

Forward Setting: Very stylized, geometric heavy world. Has Anti-Aliasing but no Dynamic Lighting.
Deferred Lighting: Dynamic Lighting. Loses default Anti-Aliasing. 


Anti-Aliasing may be able to be ignored anyway, high quality textures and lighting on insignificant environment objects could be a waste of your graphic budget. They're whizzing by the player at 60fps anyways and all it does is create more for the GPU to render. However, if there's a Hero Object (an important game object to the player) it may be worth spending more of your graphic budget into its appearance as it will be seen/paid attention to much more by the player.

Light Mapping:

Non-Moving Geometry/Lights in the scene need to be ticked to 'Static' in the Inspector.
Once the static Geometry/Lighting has been selected go to Window > Lightmapping and Bake the scene. 


You can change the Strength of Shadows on lighting to give a sense of bounced light behind objects.
Also can use the 'Bias' slider to change shadow distance/influence which will ease performance on the GPU.

Within the Lightmapping window you can also change the colour temperature of the skylight you want for the atmosphere of the scenes lighting and adjust its intensity. You can't preview this, you have to Bake the Lightmap in order to see its effect on the Unity scene.


Evening Time Skylight Lightmapped

Q: Will all of these Lightmaps being baked out to test their impact on the scene fill up my Project Folder?
A: No, every Lightmap is overwritten once baked in the scene.

The Lightmap Window also allows you to play with Shadow Bounces in order to display some reflection of object/light diffuse on other surrounding surfaces, a subtle effect like this can make a scene seem more realistic.

Using Edit > Render Settings

You can change ambient lighting and add scene Fog to alter atmosphere lighting and visibility.


In Lightmapping Settings you can also add Ambient Occlusion to game-objects that provides 'Self-Shadowing'. This effect really sits an object in the environment realistically. 
For controlling objects further in the distance you can use 'Occlusion Culling'.

Ambient Lighting, Ambient Occlusion & Skylight
Resolution:

Be aware of the platform you're aiming your game towards. Games are rarely seen above 720p.
A way to fix what resolution you want to use in Unity when playtesting (maximize on Play) is -

Edit > Project Settings > Player > Untick Default Is Fullscreen > Enter Resolution Numbers
On the 'Game' Window, change Free Aspect > Standalone (e.g. 1280x720).